
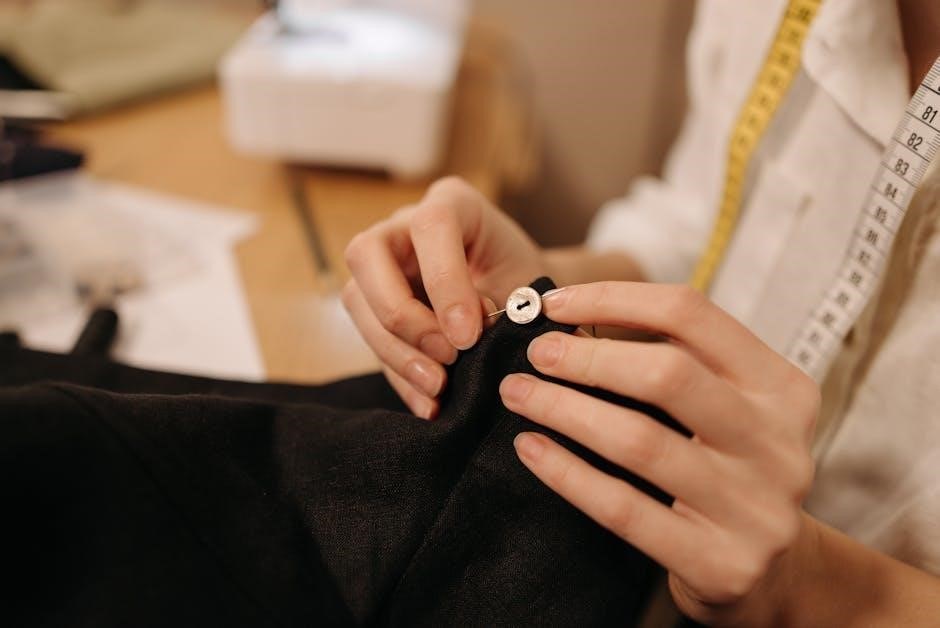
Hand sewing stitches are foundational for any sewing project․ They offer precision and creativity‚ whether repairing clothes or crafting decorative designs․ Essential stitches include the Running Stitch‚ ideal for straight lines‚ and the Backstitch‚ perfect for strong seams․ Practice these stitches to build a solid sewing skill set․
Running Stitch
The Running Stitch is the most basic and versatile stitch in hand sewing․ It is used to join two pieces of fabric together and is often employed for basting or as a foundation for other stitches․ To create a Running Stitch‚ bring the needle up through the fabric‚ insert it back about 1/4 inch away‚ and repeat․ This stitch is simple and quick‚ making it ideal for beginners․ It is also the basis for more complex stitches like the Backstitch and Whip Stitch․ The Running Stitch works well for straight lines and can be adjusted in length depending on the project․ For thicker fabrics‚ longer stitches are recommended‚ while finer fabrics require shorter ones․ This stitch is essential for mending clothes‚ sewing straight seams‚ and creating temporary stitches that can be easily removed․ Mastering the Running Stitch is a fundamental step in building your sewing skills․
Backstitch
The Backstitch is a strong and reversible stitch commonly used for sewing straight lines and outlining designs․ It is especially useful for repairing seams and creating durable hems․ To sew a Backstitch‚ bring the needle up through the fabric‚ insert it back about 1/4 inch behind where it came up‚ and repeat․ This stitch is ideal for situations where strength is essential‚ such as in denim or heavyweight fabrics․ The Backstitch is also reversible‚ meaning it looks the same on both sides of the fabric‚ making it perfect for visible stitching․ For best results‚ keep the stitches evenly spaced and not too large․ This stitch is a must-learn for anyone looking to create professional-looking seams or intricate embroidery designs․ By mastering the Backstitch‚ you can achieve crisp‚ clean lines in your sewing projects․
Blanket Stitch
The Blanket Stitch is a popular hand-sewing technique used to prevent fraying on the edges of fabrics․ It is commonly employed for blankets‚ scarves‚ and other home decor items․ This stitch is particularly effective for materials like wool or fleece‚ where a decorative and secure edge is desired․ The Blanket Stitch is easy to learn and works well for beginners․ To sew a Blanket Stitch‚ bring the needle up through the fabric at one edge‚ then insert it back about 1/4 inch away‚ creating a small loop on the fabric’s edge․ Repeat this process evenly along the edge․ The stitch creates a visible line on the right side of the fabric‚ making it both functional and decorative․ It is also reversible‚ meaning it looks consistent on both sides of the fabric․ The Blanket Stitch is a versatile and practical stitch that adds a professional finish to any project․
Whip Stitch
The Whip Stitch is a simple yet effective hand-sewing technique used to join two edges of fabric together․ It is commonly used for seaming‚ hemming‚ or repairing garments․ This stitch is quick to execute and works well for straight or curved edges․ The Whip Stitch is ideal for beginners‚ as it requires minimal practice to master․ To sew a Whip Stitch‚ bring the needle up through one edge of the fabric‚ then insert it back through the other edge‚ creating a small loop․ Repeat this process evenly along the seam․ The Whip Stitch is not the strongest of stitches‚ so it is often used for temporary fixes or for fabrics that do not require heavy-duty seams․ It is also a great stitch for decorative purposes‚ as it creates a visible yet delicate line along the fabric’s edge․
Cross Stitch

The Cross Stitch is a popular embroidery stitch used to create intricate designs and patterns on fabric․ It is characterized by an “X” shape‚ formed by two diagonal stitches crossing each other․ This stitch is widely used in needlework‚ embroidery‚ and decorative sewing projects․ Cross Stitch is ideal for creating images‚ logos‚ or text on fabric‚ making it a favorite for crafters and sewists alike․ To sew a Cross Stitch‚ bring the needle up through the fabric‚ insert it diagonally to form the first half of the “X‚” then bring it back up to complete the cross․ This stitch works best on even-weave fabrics like Aida or linen․ It is a versatile stitch that can be used for both simple and complex designs‚ making it a great choice for beginners and experienced sewists․ Cross Stitch is also commonly used in counted-thread embroidery‚ where patterns are created by counting fabric threads to ensure accuracy․
Pickstitch
The Pickstitch‚ also known as the prickstitch‚ is a simple hand-sewing stitch often used for basting or temporary stitching․ It is characterized by small‚ even pricks on the fabric’s surface‚ making it nearly invisible when removed․ To sew a Pickstitch‚ bring the needle up through the fabric‚ insert it a short distance away‚ and repeat‚ creating a series of small‚ spaced stitches․ This stitch is particularly useful in tailoring for marking patterns or holding layers of fabric together before permanent stitching․ The Pickstitch is easy to remove without leaving marks‚ making it ideal for fitting or adjusting garments․ It is also used in home decor projects‚ such as upholstery or quilting‚ where temporary stitching is needed․ The Pickstitch is a versatile and practical stitch for sewists of all skill levels‚ offering a quick and precise way to manage fabric layers temporarily․ Its simplicity makes it a great choice for beginners learning basic hand-sewing techniques․
Catchstitch
The Catchstitch is a versatile hand-sewing stitch commonly used to secure seams‚ particularly in areas requiring flexibility‚ such as hems and stretchy fabrics․ It is characterized by small‚ slanting stitches that are nearly invisible from the right side of the fabric․ To sew a Catchstitch‚ bring the needle up through the fabric‚ insert it diagonally a short distance away‚ and repeat‚ creating a series of alternating slanted stitches․ This stitch is ideal for finishing seams by hand‚ as it allows the fabric to move without breaking the thread․ It is also used in home decor projects‚ such as upholstery and curtains‚ where a strong yet discreet stitch is needed․ The Catchstitch is easy to learn and works well on both woven and knit fabrics․ Its reversible nature makes it a popular choice for garments and textiles that require a professional finish․ This stitch is essential for sewists looking to create durable and flexible seams by hand․
Machine sewing stitches enhance productivity and creativity in sewing projects․ Essential stitches include the Straight Stitch for straight lines‚ Zigzag Stitch for elastic fabrics‚ and decorative options like Satin Stitch for embellishments․ These stitches offer versatility and precision․
Straight Stitch
The Straight Stitch is the most basic machine sewing stitch‚ used for straight lines and general seaming․ It is ideal for lightweight fabrics and can be adjusted in length and tension for various projects․ This stitch is also useful for basting‚ as it is easy to remove․ When sewing‚ ensure the fabric moves smoothly under the presser foot to maintain even stitching․ For medium-weight fabrics‚ a stitch length of 2․5mm is typically recommended․ The Straight Stitch is a versatile option for constructing garments‚ home decor‚ and repairs․ Always test the stitch on a scrap of fabric before starting your project to ensure proper tension and alignment․ This fundamental stitch is a cornerstone of machine sewing‚ offering simplicity and reliability for beginners and experienced sewists alike․

Zigzag Stitch
The Zigzag Stitch is one of the most versatile machine sewing stitches‚ ideal for finishing seams‚ preventing fraying‚ and sewing stretchy fabrics․ It is particularly effective for knit materials‚ as it allows for flexibility without breaking the stitches․ The zigzag pattern creates a secure bond between fabric layers‚ making it perfect for garment construction and home decor projects․ This stitch is also useful for decorative purposes‚ such as topstitching or creating textured designs․ Many modern sewing machines offer adjustable zigzag stitch width and length‚ allowing customization based on fabric type and desired effect․ For delicate fabrics‚ a narrower zigzag is recommended‚ while thicker materials may require a wider stitch․ Always test the stitch on scrap fabric to ensure proper tension and alignment․ The Zigzag Stitch is a must-know for any sewer‚ offering both functionality and creativity in various projects․
Overlock Stitch
The Overlock Stitch is a versatile machine sewing stitch designed to finish seams professionally‚ preventing fraying and giving a clean‚ polished look․ It is commonly used in garment construction and home decor projects․ This stitch simulates the appearance of a serger by combining a straight stitch with a zigzag pattern‚ effectively sealing the fabric edges․ The Overlock Stitch is particularly useful for medium-weight fabrics like cotton‚ polyester‚ and blends․ Many modern sewing machines offer various overlock stitch options‚ including 3-thread and 4-thread versions‚ each suited for different fabric types and desired finishes․ To achieve the best results‚ adjust the stitch width and length according to the fabric thickness․ This stitch is a must-have for any sewer aiming to create professional-looking hems and seams․ It not only enhances the durability of your projects but also adds a professional touch to your work․
Satin Stitch
The Satin Stitch is a decorative machine sewing stitch known for its smooth‚ shiny‚ and dense texture‚ often used for embroidery and embellishments․ It creates a tight‚ straight-line stitch that resembles satin fabric‚ making it ideal for decorative elements like monograms‚ borders‚ or floral patterns․ This stitch is commonly used on fabrics such as silk‚ satin‚ or cotton to add a luxurious finish․ The Satin Stitch is also popular in home decor projects‚ such as tablecloths‚ pillow covers‚ and curtains‚ to create intricate designs․ While it is visually striking‚ it can be challenging to work with due to its dense stitching‚ which may require stabilizing materials like interfacing to prevent fabric movement․ Proper tension and stitch length adjustment are key to achieving professional results with this stitch․ It is a versatile option for adding delicate yet eye-catching details to your sewing projects; Always test the stitch on scrap fabric before applying it to your final piece․
Quilting Stitch
The Quilting Stitch is a versatile machine sewing stitch designed for quilting and layering fabrics together․ It is typically a straight stitch‚ often with adjustable length and width‚ making it ideal for sewing through multiple layers of fabric․ This stitch is essential for quilting projects‚ as it helps secure batting and fabric layers neatly․ The Quilting Stitch is also used for decorative topstitching and can be adjusted to create varying textures․ When using this stitch‚ maintaining consistent tension and spacing is crucial for professional-looking results․ It is commonly used in home decor projects‚ such as quilts‚ duvets‚ and patchwork designs․ For best results‚ use a walking foot or even feed foot to guide the fabric smoothly․ This stitch is a must-have for quilters and sewists working on layered or bulky fabrics‚ ensuring stability and durability in every seam․
Tools and Materials for Sewing
Essential sewing tools include high-quality needles‚ threads‚ and fabric shears․ Proper fabric preparation and seam guides ensure accuracy․ These elements are crucial for achieving professional sewing results․
Needles and Threads
Choosing the right needles and threads is crucial for successful sewing․ Needles come in various types‚ such as sharp‚ blunt‚ or embroidery needles‚ each suited for specific fabrics or techniques․ For example‚ sharp needles are ideal for woven fabrics‚ while blunt needles work best for knits or thicker materials․
Threads are available in cotton‚ polyester‚ silk‚ or blends‚ with different weights and colors․ Always match the thread color to your fabric for a seamless look․ Using the correct needle size and thread type ensures strong‚ even stitches and prevents fabric damage․
Specialized threads‚ like metallic or elastic threads‚ add decorative or stretchable elements to your projects․ For hand sewing‚ waxing or conditioning threads can reduce tangling․ Quality needles and threads are essential for professional-looking results‚ whether sewing by hand or machine․

Fabric Preparation
Fabric preparation is essential for successful sewing projects․ Start by washing and drying your fabric to remove finishes and pre-shrink it‚ especially for natural fibers like cotton and linen․ Iron the fabric while damp to eliminate wrinkles and create a smooth surface for cutting․ For delicate or stretchy fabrics‚ use stabilizers like interfacing to add structure and prevent distortion․ Always align patterns with the fabric’s grain to ensure proper drape and fit‚ crucial for garments requiring structure․ Using scissors or a rotary cutter with a mat helps achieve precise cuts․ Ironing before cutting ensures accurate measurements and flat patterns․ Pressing as you sew maintains the project’s shape and ensures a polished finish․ Proper preparation leads to accurate cuts and professional-looking results‚ making the extra effort worthwhile for a successful sewing outcome․
Seam Guides
Seam guides are essential tools for achieving precise and consistent stitching in sewing projects․ They help maintain accurate seam allowances‚ ensuring professional-looking results․ Magnetic seam guides can be attached to sewing machines‚ while adhesive strips or markings on the machine bed provide visual references․ For hand sewing‚ rulers or measuring tapes serve as guides to keep stitches aligned․ Proper alignment is crucial for straight stitching and even fabric feeding․ Using seam guides reduces errors and saves time‚ especially for beginners․ They are particularly useful for quilting‚ hemming‚ and sewing straight lines; Adjusting the guide according to the project’s requirements ensures a perfect fit․ Seam guides enhance productivity by minimizing the need for constant measuring‚ allowing sewists to focus on the creative aspects of their work․ They are indispensable for achieving professional finishes and make sewing more efficient and enjoyable for all skill levels․
Troubleshooting Common Mistakes
Common sewing mistakes include uneven stitches‚ fabric slipping‚ and incorrect stitch length or tension; Adjusting machine settings or hand-sewing techniques can resolve these issues․ Proper thread tension and fabric alignment are key to achieving consistent results․
Uneven Stitches

Uneven stitches are a common issue in both hand and machine sewing․ They can occur due to incorrect thread tension‚ improper needle size‚ or uneven fabric handling․ To address this‚ check your machine’s tension settings or manually adjust thread tightness for hand sewing․ Using the right needle size for your fabric type can also help․ Additionally‚ ensure fabric is held taut but not stretched during sewing․ For hand stitches‚ maintaining consistent stitch length and spacing is key․ If using a machine‚ consult the user manual to adjust stitch length and width․ Practicing on scrap fabric can help develop muscle memory for even stitching․ Regularly cleaning and maintaining your sewing machine can also prevent uneven stitch formation․ By identifying the root cause and making small adjustments‚ you can achieve more uniform and professional-looking results in your sewing projects․
Fabric Slipping
Fabric slipping is a common challenge during sewing‚ especially when working with delicate‚ stretchy‚ or slippery fabrics like silk‚ chiffon‚ or knits․ This issue can lead to misaligned seams and uneven stitching․ To prevent fabric slipping‚ use a walking foot or Teflon foot on your sewing machine‚ as these provide better grip․ For hand sewing‚ gently pinching the fabric or using a stabilizing material like interfacing can help․ Another effective solution is to place tissue paper or a scrap fabric underneath the working fabric to add traction․ Using the right needle type‚ such as a sharp or stretch needle‚ can also reduce slippage․ Additionally‚ ensuring proper pin placement and sewing at a steady pace can minimize fabric movement․ By implementing these techniques‚ you can maintain control over your fabric and achieve smooth‚ professional-looking results in your sewing projects․
Incorrect Stitch Length or Tension
Incorrect stitch length or tension is a common issue that can affect the quality of your sewing․ If the stitches are too loose‚ the fabric may pucker or the seams may weaken․ Conversely‚ stitches that are too tight can cause the fabric to bunch up or even tear․ To address this‚ ensure your sewing machine is set to the appropriate stitch length and width for the type of fabric you are using․ For hand sewing‚ maintain consistent stitch length and tension by sewing at a steady pace․ Regularly check your stitches and adjust as needed․ Using a sewing guide or gauge can help maintain uniformity․ Additionally‚ ensure your thread is properly threaded through the machine and that the bobbin is correctly installed․ Testing your stitches on scrap fabric before starting your project can help prevent errors and ensure professional-looking results․ Proper tension and stitch length are crucial for durable and visually appealing seams․
Advanced Sewing Techniques
Advanced sewing techniques elevate your projects with precision and creativity․ Master methods like decorative stitching and reinforcing seams to enhance both functionality and aesthetics․ These skills refine your craftsmanship for professional results․
Decorative Stitching
Decorative stitching is a creative way to enhance your sewing projects․ It involves using various stitches to add visual interest and texture․ Techniques like the cross stitch and satin stitch are popular for embellishments․ These stitches can be used to create intricate patterns‚ borders‚ or motifs on fabric․ When applying decorative stitches‚ consider the fabric type and thread color to ensure the design stands out․ For example‚ metallic threads can add a luxurious touch‚ while contrasting colors create bold statements․ Decorative stitching is also useful for personalizing garments or home decor items․ With practice‚ you can master these stitches to elevate your projects from simple to extraordinary․Whether you’re making clothing‚ accessories‚ or home decor‚ decorative stitching offers endless possibilities for artistic expression․ Explore different stitch combinations and materials to develop your unique style and make your creations truly special․
Reinforcing Seams

Reinforcing seams is essential for adding durability to your sewing projects․ This technique prevents fraying and strengthens high-stress areas․ One common method is using a backstitch or whipstitch along the seam allowance․ For machine sewing‚ a zigzag stitch or overlock stitch works well to encase raw edges․ Another technique is staystitching curved or stretchy fabrics before sewing to maintain stability․ Additionally‚ interfacing or stabilizer can be applied to areas like buttonholes or zippers for extra support․ Reinforcing seams is particularly important for garments‚ bags‚ and home decor items that undergo frequent use․ By incorporating these methods‚ you ensure your creations are long-lasting and professional-looking․ Properly reinforced seams also enhance the overall finish of your projects‚ making them more polished and resilient to wear and tear․ Whether hand or machine sewing‚ reinforcing seams is a crucial step in achieving high-quality results․